EC2 is an Infrastructure as a Service (IaaS) offering from AWS that provides compute capacity in the AWS cloud. Think of it like renting a virtual computer on the Internet to run our apps.
Login or Sign up here to get started.
Setting up an EC2 instance
When you create a new AWS account and verify the payment method, you get a free limited trial of some of the AWS products for a year. EC2 is one such product.
From the top-right menu, choose the region where you want to create your Instance. Put simply, you'll be renting a computer that would be physically located in this region. If you're unsure about the region, choose the one closest to you or your target audience.

In the same header, click Services and choose "EC2" under "Compute".

From the left sidebar, choose Instances.
This is the place where all of your future instances will be listed. To create your first instance, click the Launch button.
This would start a wizard. There are a total of seven steps.
Choose an Amazon Machine Image (AMI) - Let's choose the operating system or a "template" we want to set up on our instance.
For this example, we'll be using Ubuntu 20.04.

Choose the AMI you wish to set up on your EC2 Instance
The next step is Choosing an Instance Type.
Think of it like choosing the specifications for your new virtual computer. Pick the one matching your requirements.
One of the configurations eligible for the free tier is T2.Micro.

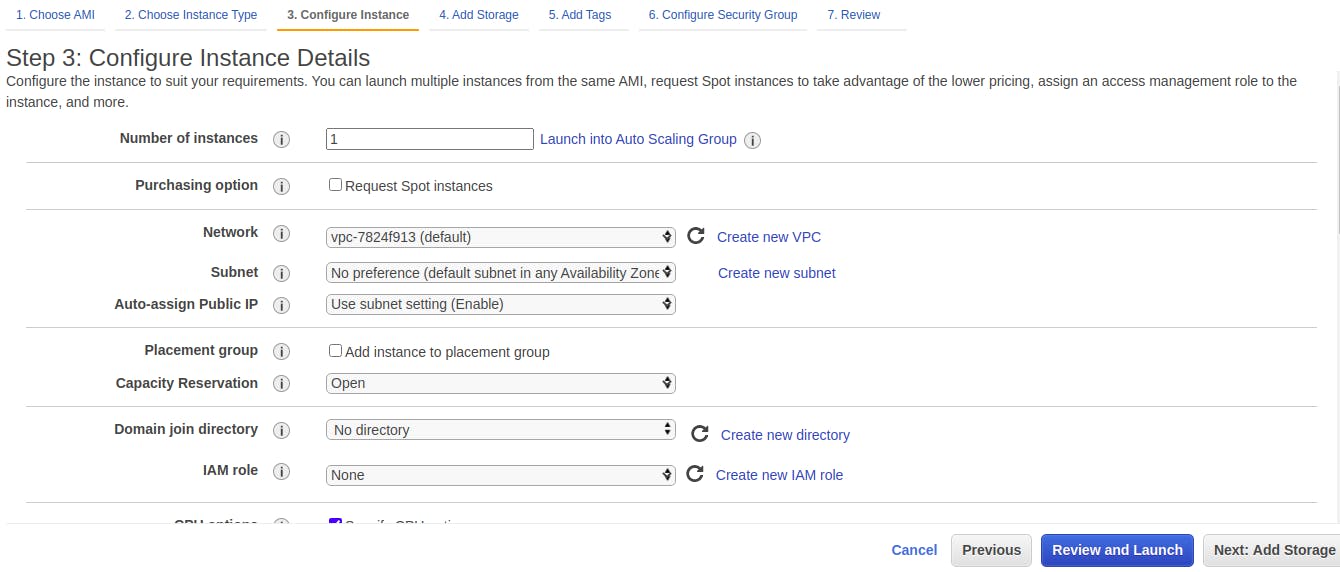
The next step is Configuring the Instance Details.
Here you can configure advanced options available for your instance like CPU Cores, Threads, Network, Shutdown behavior, Monitoring**,** etc.
You might want to leave these settings to the default values.
The next step is Adding Storage to our Instance.
AWS offers different types of Storage for different purposes like IOPS volumes, which are used for critical I/O operations like in transactional databases, and Magnetic Spinning Drives, which are required when we need a lot of storage space.
For our example, we'll choose a single general-purpose SSD volume.

The next step is Adding Tags. A tag is a label that we or AWS assigns to an AWS resource. We can use tags to organize our resources and cost allocation tags to track our AWS costs on a detailed level. This step is optional.

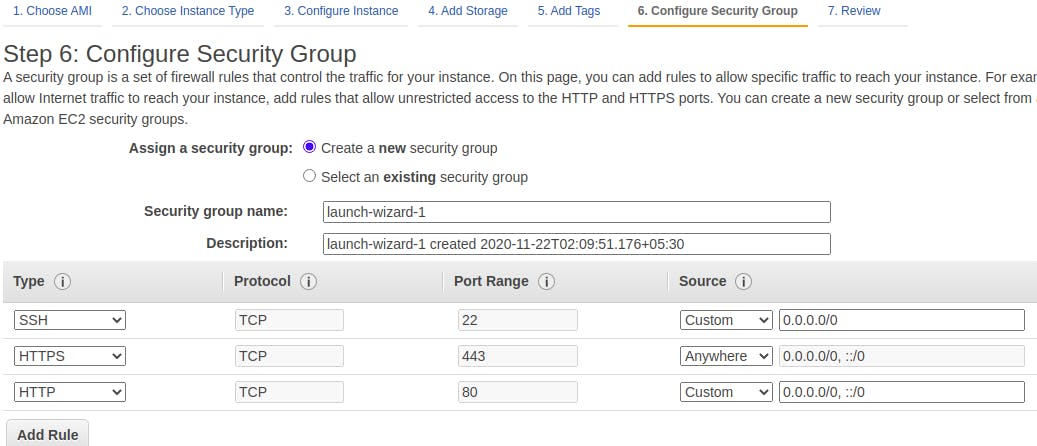
The next step is Configuring the Security Group. A security group is a set of firewall rules that control the network traffic for our instance.
By default, a TCP on Port 22 is open to enable SSH access. We would need this to connect our PC to that remote instance we're about to launch.
If you're planning to host a website in this instance, you might want to add a rule for HTTP and HTTPS here. In the Source, select "Anywhere".
Similarly, if you're planning to create an email server in this instance, you might have to open ports for it. Here is a list of the most commonly used port numbers.
Next, click the Launch button. A prompt to set up key pair would appear.
Choose "Create a new key pair" and give it a name.
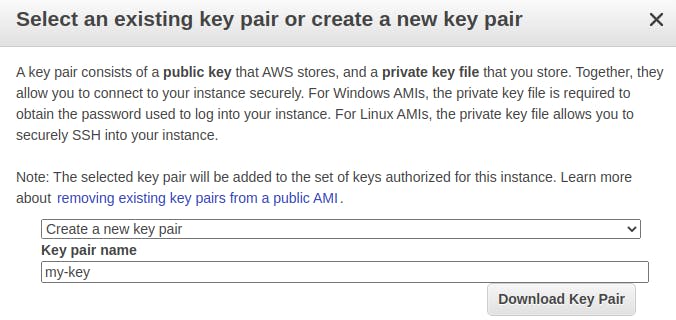
Click "Download Key Pair". A prompt to save a private key file would appear. Save it to a safe location. This key will be later used to access this instance from your PC.
Next, click Launch Instance. A launch status screen would appear. It would take a minute or two to launch.

Click on the generated instance id. It would take you back to the list of instances. You would see your new instance here.
You have now successfully created a new EC2 instance. 😄
It should have been allocated a dynamic IP address from the AWS pool. Since this IP address is regenerated after every few hours, if you're planning to regularly access this instance outside AWS, for example hosting databases, apps and websites, you might require a static IP address.
Getting a static IP address for our instance
In your EC2 dashboard, click "Elastic IPs" on the main screen or choose from the sidebar.
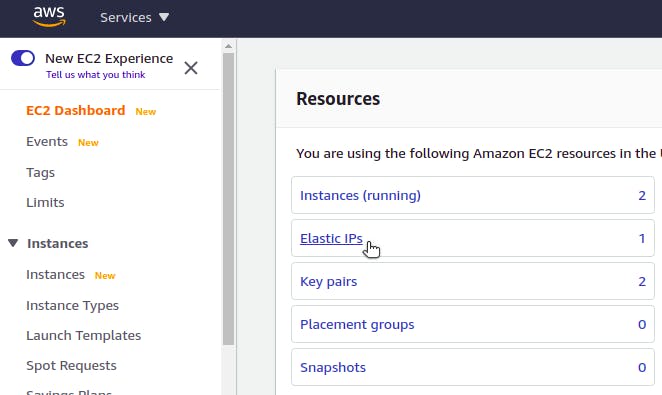
Select "Elastic IPs"
Click the button "Allocate Elastic IP Address". From the settings, choose "Amazon's pool of IPv4 addresses".

Click "Allocate".
You'll see a new IP address added to the list.

Click that IP address to open up its configuration. Then click Allocate Elastic IP Address button.
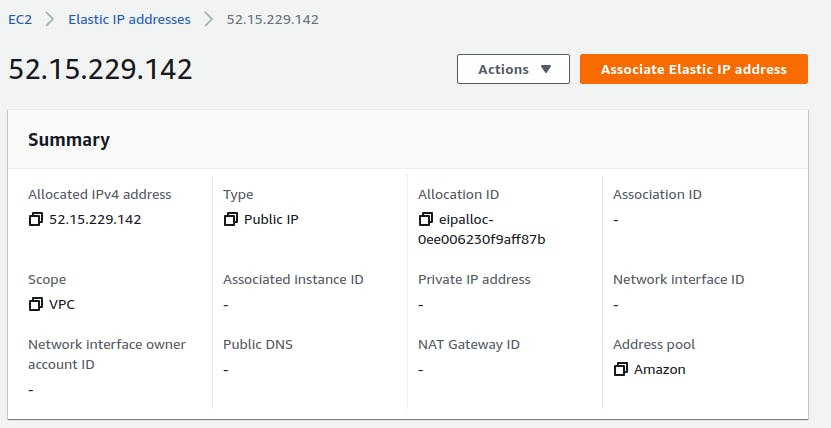
Under Resource Type, choose Instance. Under Instance, select the name or id of the instance we recently created and then click Associate.
Now you have successfully attached a new static IP to your instance. You can verify this by viewing instance details.
Connecting your local PC to a remote EC2 instance using SSH
Remember that we left port 22 open in our instance's security group? Well, this was the reason. We'll be using that port to connect via SSH.
If you're using a Windows machine, you'll have to use a third-party telnet client, PuTTY.
If you're using Linux or Mac, here are the steps:
Open up the terminal and navigate to the directory where we stored the downloaded private key.
Change its file permissions to 400
chmod 400 your-key.pem
Establish SSH Connection
ssh -i your-key.pem username@ip-address
Here, the username would be determined by the AMI we installed on our instance in the first step. For example, Ubuntu generally has the username "ubuntu".
Also, replace the "IP-address" with the one we generated and attached to our instance.
For example
ssh -i your-key.pem ubuntu@52.15.229.142
You might get a warning about saving the key fingerprint. Continue connecting by entering "yes".
You should have now successfully established an SSH connection.
To execute a command as a superuser (root) use the prefix "sudo".
For example, "sudo mv file.txt new-file.txt"
To switch the user to root, use the command
sudo -i
I hope everything went smoothly for you. If you have any queries, let me know in the comment section below.
